1

Survival Hax Survival Shovel Review

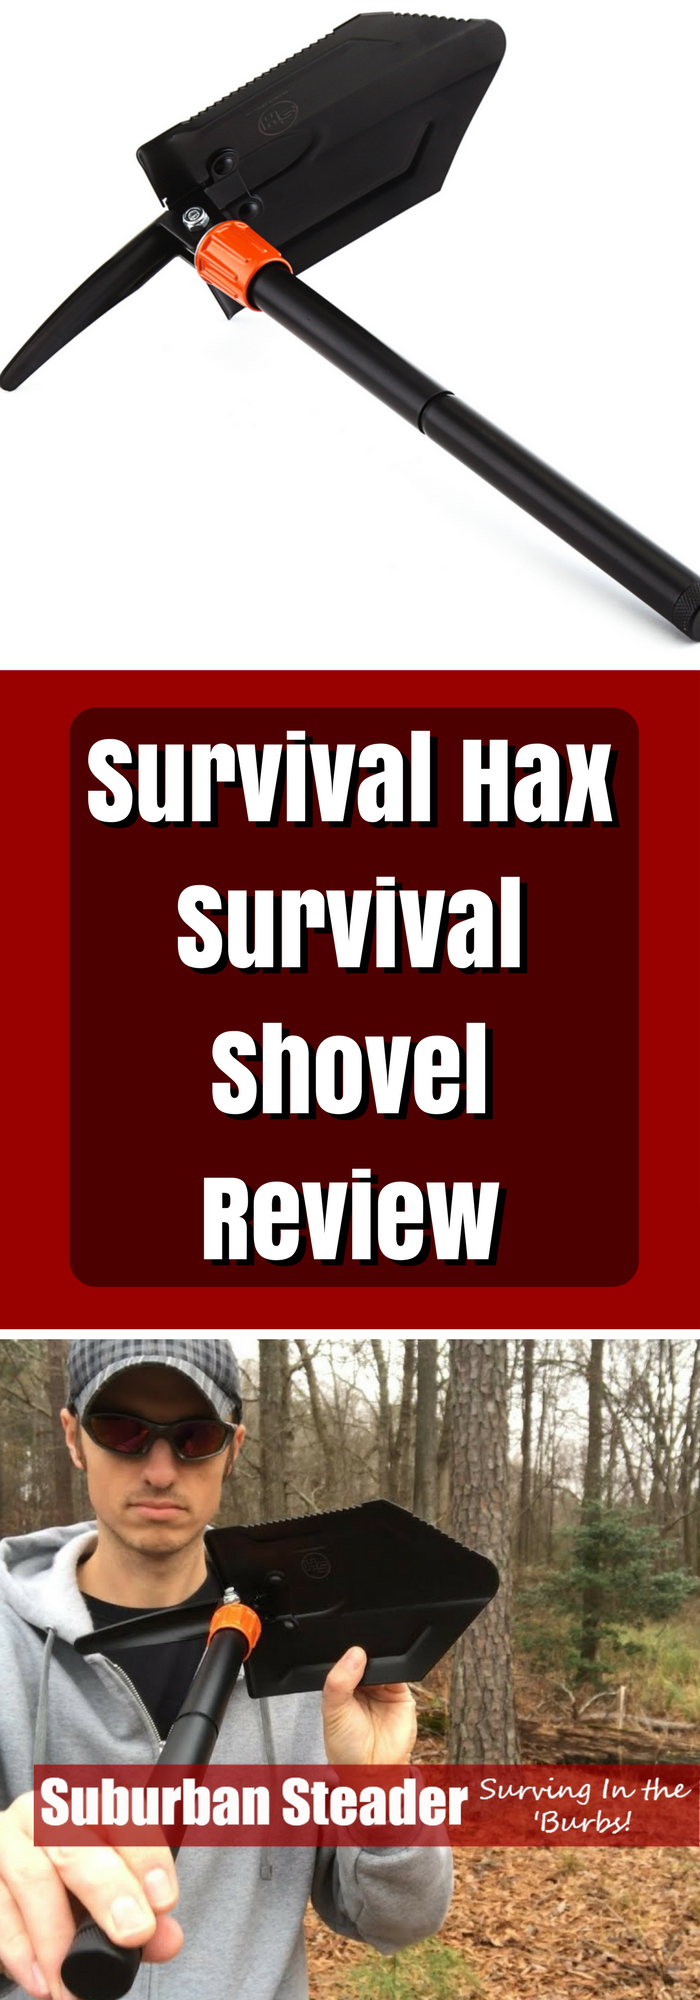
I was recently approached by Survival Hax to review a new shovel they had come out with.  The Survival Hax Survival Shovel is filling a void in the marketplace for a budget-friendly, collapsible shovel.  It’s small and lightweight which makes it conceptually ideal for hiking and backpacking.  Likewise, it’s adjustable which promotes ease of use.  Come check out what I thought of the shovel and where it fits into my daily loadout.

Product Description

Survival Hax describes their Survival Shovel as “a durable yet lightweight portable folding shovel made for the outdoors. With a serrated edge on one side, our trowel can be turned into a saw to cut away brush or make kindling. This multi-purpose shovel also doubles as a pickaxe and has a fire starter flint.”

It measures 24 inches long when unfolded and collapses to 8.6 inches wide by 8.2 inches high.  The whole unit weighs about 2lbs.

The shovel head is steel manganese with the handle being steel as well.  The orange adjustment bolt is made out of an aluminum alloy.

The overall technical specs are as follows:

Technical Specs:

  • Full shovel length: 24in
  • Pickaxe length: 16.9in
  • Folded shovel length: 8.6in
  • Handle length: 16.1in
  • Head length: 8.2in
  • Head width: 5.9in
  • Pickaxe length: 5.3in
  • Fire Starter length: 2.3in
  • Carry bag: 9.8in x 7in
  • Weight: 2lbs

The Pros

The Survival Hax Survival shovel does have some things going for it.  First is its compact nature when folded up.  I was able to throw this shovel in my backpack and have it take up very little room.  It’s nice to be able to stow a shovel into my pack and not have to lash an oddly shaped item to the outside of it.

The second thing I liked about the Survival Hax Survival Shovel was the versatility.  The shovel and pickaxe can be oriented in many different orientations thanks to the adjustability of the orange adjustment bolt.  The adjustability allows you to attack the ground from many different angles than a traditional shovel.  The “serrated” and “blade” edge of the shovel also present the possibility of this being a cutting tool.

The Cons

There are quite a few things working against the Survival Hax Shovel.  Let’s start at the blade end and work up the handle.

The shovel blade and pickaxe themselves have a few issues.  The shovel itself performed well as a shovel.  The pickaxe performed equally as well.  Keep in mind that Long Island is just a big freaking sandbar so our soil isn’t terribly difficult to dig in.  The edge of the shovel is serrated and supposed to be sharp on the other side.  Well, neither of these blades were all that sharp or useful.  That being said, they were there and, with a file and some elbow grease, they would be useful.

The orange adjustment bolt is the first real issue I ran into.  Survival Hax uses a fine thread on this bolt (actually, in all threaded areas of the shovel) and it takes forever to tighten and loosen the bolt.  The fine thread is also is quite susceptible to sand getting in them and causing issues with tightening or loosening.

Further up, the handle extension threads on and has the same fine pitch problem I mentioned above.  I found that trying to tighten the orange adjustment invariably meant the handle extension loosening up.  The fine thread just doesn’t seem to lock up the way I’d want it to.

At the very end of the handle is the ferrocerium rod.  I had very little luck getting quality sparks out of this rod (as you’ll see in the YouTube video review below).  It’s nice to have, in a pinch, but I wouldn’t count on it.  I did like that the tube was hollow and could be used to store more gear.

Overall Impression

I really want to say that the Survival Hax Survival Shovel is something everyone should have in their Bug Out Bag but I can’t wholly endorse it.  It seems weak in construction to me (in fact, some have gotten it to fail during testing) and a lot of the shortcomings I mentioned above just don’t meet my tough criteria for being a “bulletproof” piece of equipment.

That being said, I do want to applaud Survival Hax.  They’ve put together a budget-friendly piece of equipment that, with a few changes, could be a quality piece of equipment.  If they changed the threading and improved the quality of the ferrocerium, I’d be more apt to recommend it.  I’d also want to see the serrated edges either taken away or sharper.

Overall, the Survival Hax Shovel is a middle of the road shovel that has some nice perks (the pickaxe is a great addition in my opinion).

Personally, I’ll be putting the Survival Hax Survival Shovel in my truck to be used in snow removal situations.  I absolutely trust it for that and can see it being a perfect tool for those kinds of jobs.

[youtube_sc url=”FQ_Kmfl6Azg” width=”400″]

Buying A Survival Hax Survival Shovel

If you’re interested in buying the Survival Hax Survival Shovel, you can buy them on Amazon.
Survival Hax Survival Shovel


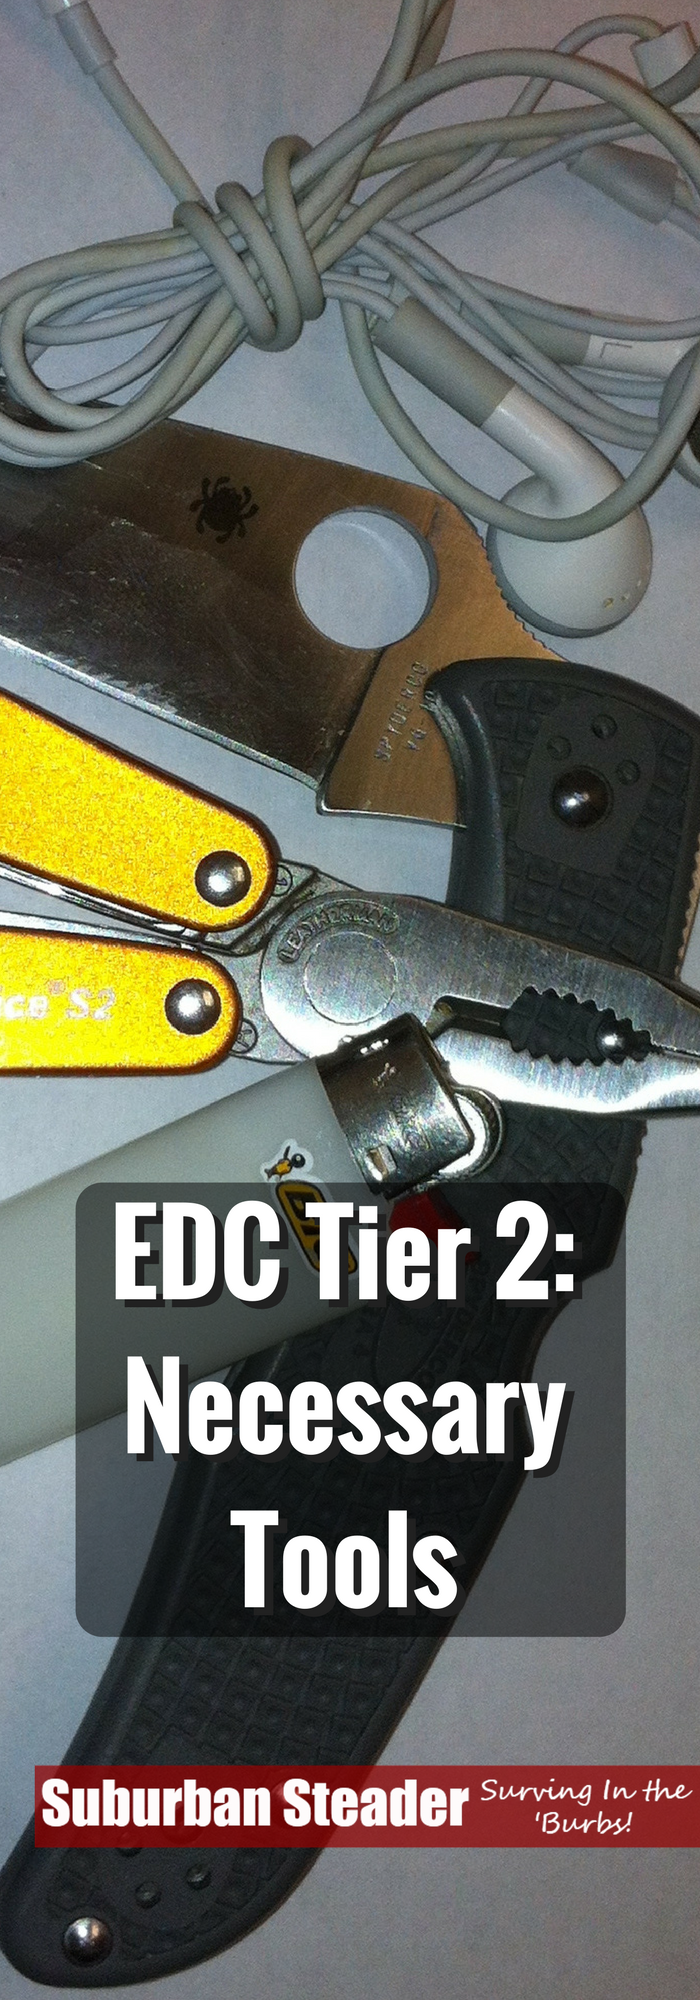
EDC Tier 2 – Necessary Tools

I’ve previously discussed tiered EDC methodology as well as what I consider ‘must have’ EDC items.  Continuing with the EDC series, I’ll discuss items on my EDC Tier 2 list which are commonly considered ‘necessary tools’ in an EDC environment.    These items are on my body 98% of the time and, while I don’t feel completely naked without them, I do feel quite uneasy most of the time I’m not carrying them.

EDC Tier 2 – What It Means

EDC Tier 2 items are items I leave the house without only on the rarest of occasions.  These items, for the most part, are on the “No Fly” list meaning I wouldn’t be able to get through airport security with them.  Despite this restriction, these items have tremendous utility and I use them all almost daily.

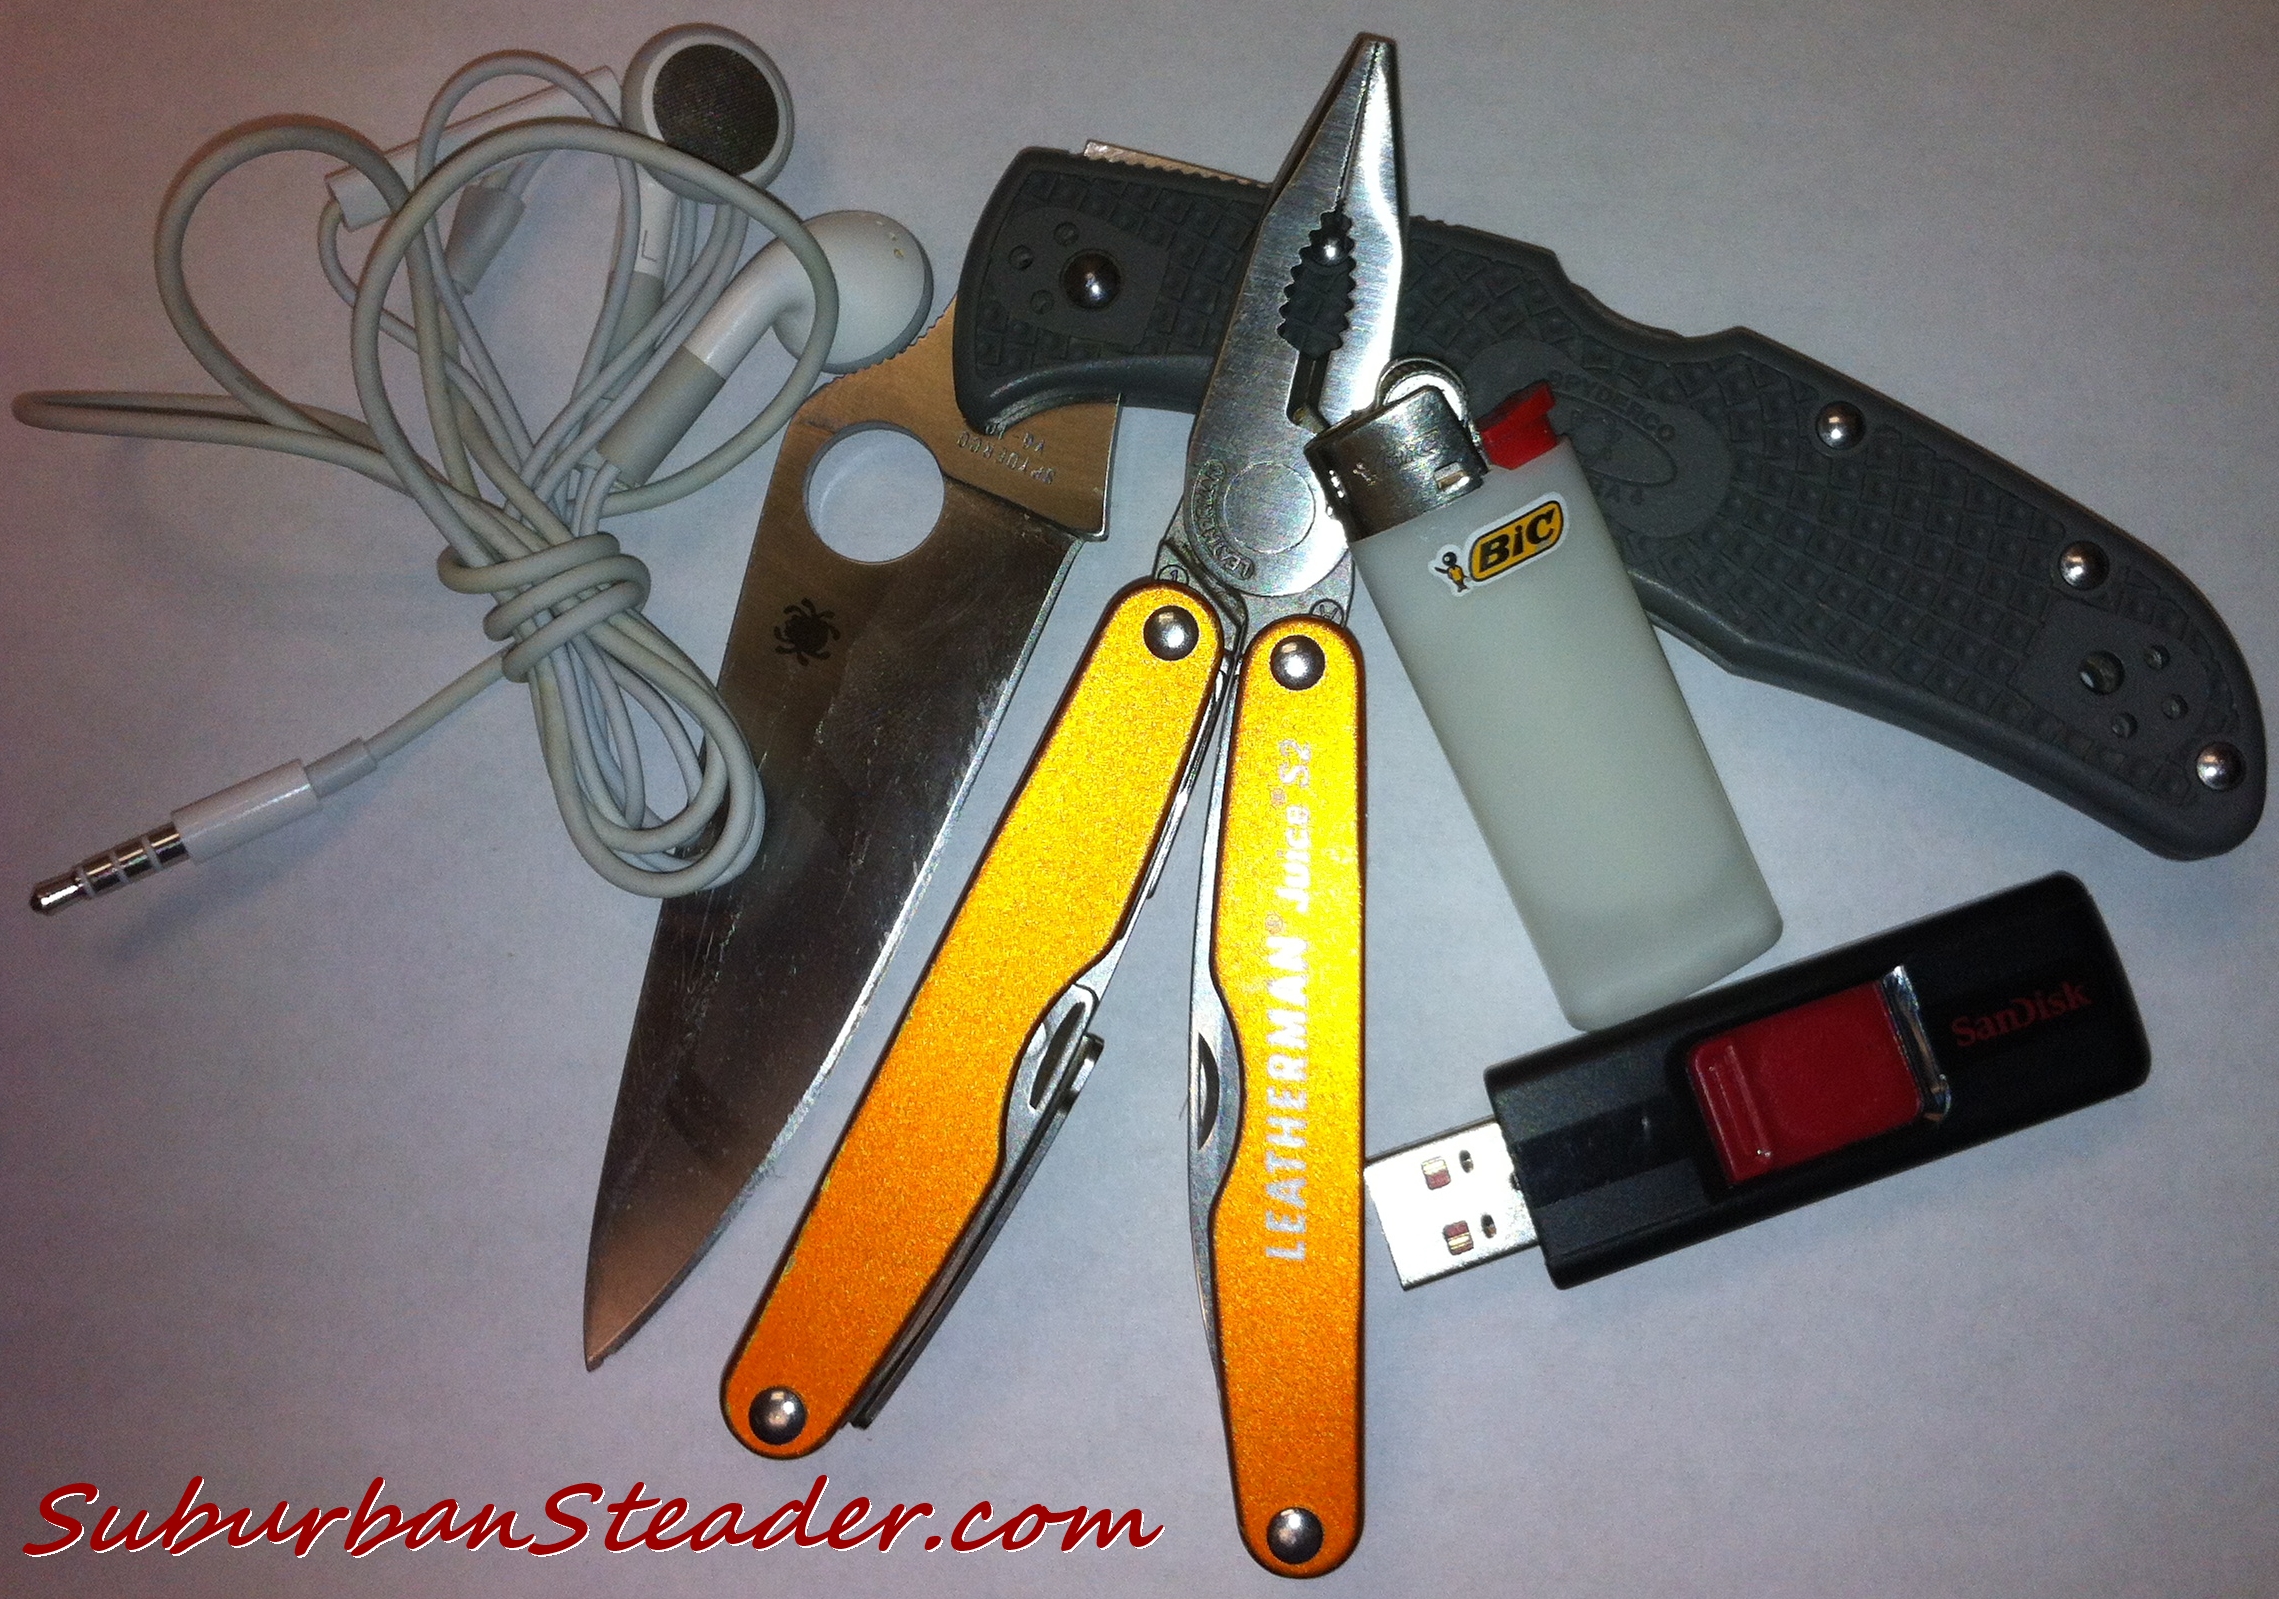
The five items in this list provide protection, utility, fire, entertainment and data transfer capability on a daily basis.  They include:

Pocket Knife

If you ready any prepper/survival/homesteading blog, you’re bound to run across numerous articles on pocket knives.  They seem to be a mainstay in most people’s base must haves and my EDC Tier 2 list is no different.  I constantly have a pocket knife on me with the exception of when I’m flying.  As I’ve discussed before, I typically carry the Spyderco Endura 4 FFG which is a simple, yet very functional pocket knife.  I use this pocket knife for everything from opening mail at the office to whittling sticks on the trail when I’m hiking.  If you don’t currently carry a knife, I cannot completely explain to you how often you will use one.  Take my word for it – you NEED an EDC pocket knife.

Multitool

I recently reviewed the Leatherman Juice S2 multitool that I carry as part of my EDC Tier 2 kit.  As useful as a pocket knife is, sometimes there are just times when you need more than a blade.  A multitool will give you pliers, screwdrivers, scissors and can openers in addition to other tools.  The functionality is almost limitless and allows you to get most emergency jobs done without carrying around a full toolkit.  I highly recommend the Leatherman Juice S2 for its size and convenience, but any multitool will meet your needs as long as you have a variety of tools contained within it.  If push came to shove and I could only carry either a pocket knife or a multitool, I’d go with the multitool for the simple reason that most multitools have blades built into them.

Small Lighter

Fire provides light, warmth, cooking ability and, possibly most important, comfort.  For that reason, I always carry a small lighter so that I can start a fire if need be.  The small Bic lighters are extremely tiny and can be carry in the fifth pocket of a pair of jeans without knowing it.  For that reason, they are a great edition to my EDC Tier 2 kit.  While I don’t smoke, I have on occasion provided a light for a smoker.  This act usually provides me with a way to start a conversation with a new person.  Meeting new people allows me to network and, in a tough situation, may produce allies or information.

Headphones

Headphones are definitely more of a comfort item than a ‘must have’ in terms of survival.  They have become part of my EDC Tier 2 kit for a few reasons.  First, when travelling, it is much easier to listen to music, podcasts, videos, etc on your smart phone without annoying those around you when you have a set of headphones.  Secondly, I like to keep my phone conversations to myself and the Apple iPhone headphones that I carry have a built in microphone which allows you to have a conversation without holding your phone or talking loudly.  Again, these are more of a comfort item but their small size and utility make them a must have for me.

USB Flash Drive

In my line of work, I’m constantly working between multiple computers.  A small USB flash drive fits easily in my pocket and allows me to easily move between workstations without problem.  I keep some important personal documents on this USB flash drive as well (encrypted, of course, in case I lose it).  These personal document may come in handy in a situation where I’m stranded or unable to get to the original documents.  They include PDF versions of driver’s licenses, birth certificates, bank account records, credit cards  and passports among other items.

EDC Tier 2

Conclusion

My EDC Tier 2 kit contains some very basic items that have a lot of functionality.  While I don’t need these items at all times, I do feel that I need must have them on a regular basis.  I highly recommend building an EDC Tier 2 kit similar to the one described above for your daily use.

What items do you consider part of your EDC Tier 2 kit? Let me know in the comments.

In case you’re interested, here’s where you can buy any of the items listed in this post:

  • Spyderco Endura 4 FFG Pocket Knife ($66 at Amazon.com)
  • Leatherman Juice S2 Multitool ($41 at Amazon.com)
  • Small Bic Ligther (at any drug store or grocery store)
  • iPhone Headphones ($29 at Apple.com)
  • SanDisk 8GB USB Flash Drive ($9 at Amazon.com)

EDC Tier 2


EDC Tier 1 – Must Haves

If you’re like me, then each item in your EDC kit has a level of importance associated to it.

Some items you can survive without, but others are “must haves” that you will always have with you.

In my last post, I talked about this overarching tier approach. Today I want to expand specifically on my Tier 1 items.

EDC Tier 1 – What It Means

Plain and simple, Tier 1 items are the core components I won’t leave the house without.  It doesn’t matter if I’m going on vacation a few states away with the entire family or down the street to pick up a gallon of milk.  These items are ALWAYS on my person.

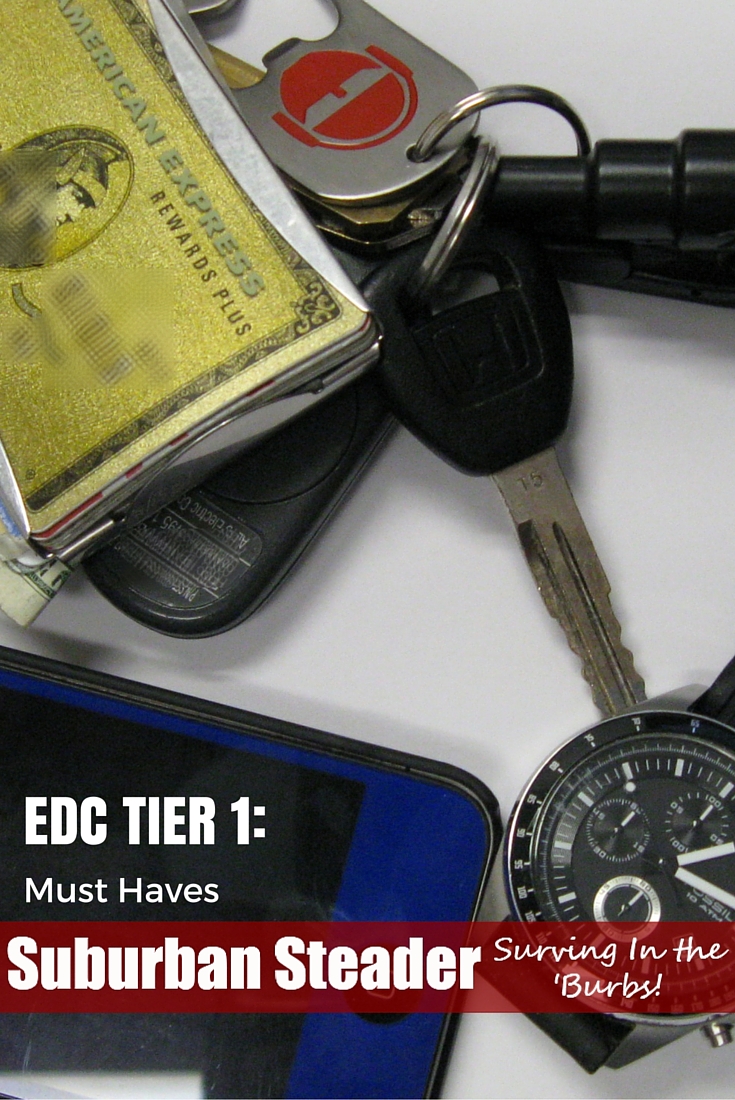
The four items in this list provide the most basic of essentials to me: purchasing power, communication, navigation and safety/protection.

The list is short, but distinguished:

Cellphone

Being the technology-obsessed person I am, I never go anywhere without my cellphone.  I’m currently running an iPhone as you can see in the picture above. My cellphone provides me with many different assets including communication, navigation (compass, maps, etc) and information access via internet hookup. It also acts as a camera if a situation needs documentation and a flashlight in emergency situations.

Keys

Obviously, my keys provide me the ability to operate my vehicle. They also ensure that I can lock/unlock my house.

In addition to my keys, I also carry a ResQMe Car Escape device.  This item is crucial for any possible situation where you are trapped in your car.  It provides you with the ability to break glass and cut a car safety belt.

The final item on my keychain is a bottle opener (thanks to Jack at The Survival Podcast).  You always have to be prepared to open an adult beverage or two!

Also, remember that keys can be used as a defense item in a pinch.  Imagine getting punched by a guy with keys sticking out between his knuckles.  I doubt that would feel good.

Wallet

The cash (you always carry cash, right?) and credit/debit cards I carry allow me to purchase items I may need (water, gas, food, medicine, etc).  I also have ID and a AAA card on me. You never know when you’re going to need any of that. No more needs to be said here.

Watch

This item is probably the most ‘aesthetic’ item out of the group, but it still serves multiple purposes. I’m obviously able to tell time with it.  By wearing a watch, I have a backup (redundancy is key) to the clock on my cellphone which has become my primary time keeper.

Also, this particular model watch has a tachymeter on it. I’m not going to get into the specifics of what a tachymeter is (you can read about it here) other than to say that it provides me with the ability to measure speed and/or distance.

Finally, a non-digital watch gives me the ability to find north via the location of the sun.

Conclusion

Overall, my Tier 1 EDC kit is pretty basic, but contains a handful of items I could not and would not leave the house without. Functioning, and getting home, without these items would be incredibly difficult.  The best part about this kit is that it can be worn on your body at all times no matter what kind of clothes you are wearing.

What are the items you can’t leave the house without? Let me know in the comments.

In case you’re interested, here’s where you can buy any of the items listed in this post:

Each item in your EDC kit has a level of importance associated to it. Some items you can survive without, but others are "must haves" that…


EDC Methodology – It’s More Important Than What You Carry

Let’s get one thing straight: everyone’s idea of EveryDay Carry (EDC) equipment is different.  EDC is as personalized as the clothes you wear and the thoughts you think.  Rather than spending time reviewing my EDC, I’m going to use this article to talk to you about my EDC Methodology.

Tiered EDC Methodology

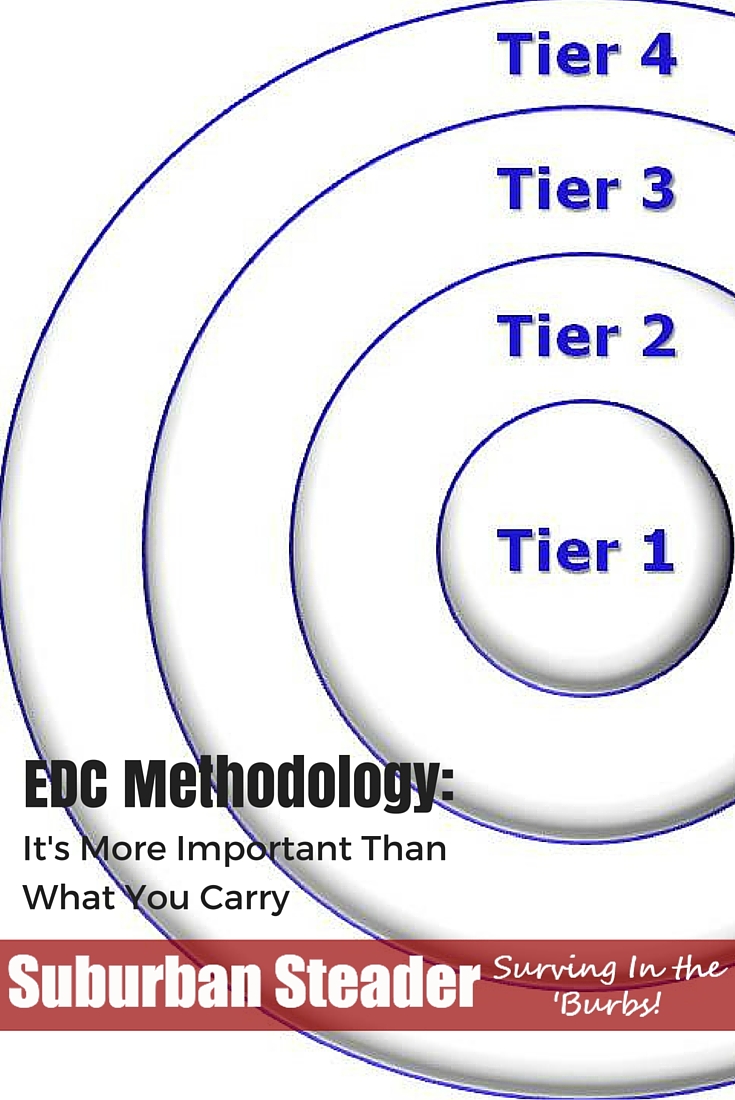
I follow a four tier methodology when it comes to my EDC kit.  Each tier builds on the one below it and provides more protection to the “what if’s” that may arise during the day.

Before anyone calls me out on it, I fully admit to getting this idea from TheUrbanPrepper and adapting it for my own needs.

Let’s break down the tiers:

Tier 1 – Absolute Must Haves

The items that fall into Tier 1 are the items that I would feel naked without.  I carry these items on my person and will always have them on me.  Items that fall into this category include: keys, watch, wallet (w/ID, credit cards and cash) and my cellphone.  Not having one of these would put me at a severe disadvantage with just getting around.

Tier 2 – Necessary Tools

I carry these items 98% of the time and they are also always carried on my person.  For the most part, I feel naked without these items as well.  My basic differentiation between the items in this tier and the items in Tier 1 are that this is my “No Fly” tier (with a few exceptions) meaning these are, mostly, items I wouldn’t be able to get through airport security.  Items in this list include: a knife, a multi-tool, small lighter, headphones and a USB drive.  The last two items can obviously be brought on a plane, but I don’t feel absolutely naked without them, so they fall into Tier 2.

Tier 3 – “Full Pockets”

The items in this tier are important to have on you, but can fill up your pockets pretty quickly.  Typically, I will assess my trip and carry some part of this tier at all times.  When the weather is colder and I have a jacket, I’ll carry most of the items in this tier simply because I have the pocket room.  Items in this tier typically include: an Altoids survival kit, pen/pencil, small notebook and a mini medical kit.  I can get by not having all of these items all the time, but I do try to carry as much of them as possible.

Tier 4 – EDC Bag

My EDC bag is far from ‘tacticool.’  In fact, it’s an old O’Neill surfing backpack.  While the bag itself is nothing special, it does carry all the extraneous EDC kit I need including: a laptop, laptop power supply, a larger notebook, various pens and pencils, additional headphones, paperwork for work, a handheld GPS, a water bottle, extra gloves and hat (as weather dictates), a Tool Logic ICE Companion and various other items.  I’ll be doing a full EDC Bag review later in this series.  Just know that my EDC Bag is typically with me and is modified daily for the adventure du jour.

Conclusion – Planning Is Crucial

I can guarantee that the equipment you need every day looks nothing like the equipment I need everyday.  That doesn’t mean you can’t benefit from how I derive my EDC.

The important step here is planning.  You need to really think through what you do each day and what potential problems you could run into.

For instance, I drive back and forth to an office job five days a week.  During the week, I don’t spend much time outside so my EDC kit doesn’t need to contain a lot in terms of outdoor survival items.

Instead, my EDC needs to concentrate on ‘surviving’ the commute and any trouble that may come my way during that time.  I also must make sure I carry all I need for the office.  I do tweak my EDC on the weekends to accommodate where I’m heading and whether it’s solo or with the family.

As you can see, a little planning let’s you figure out a top-level approach to your EDC.

How does your EDC Methodology work? Does this approach make sense to you? Let us know what you think on in the comments or on Facebook!
Everyone's idea of EveryDay Carry (EDC) equipment is different. EDC methodology is as personalized as the clothes you wear and the thoughts you think...