Hike Recon: How To Prep For Your Next Hike
If you were ever in Boy Scouts or Girl Scouts, you are familiar with the “Be Prepared” motto. It’s a good concept to follow throughout all aspects of life. One of the most important places to be prepared is when you’re heading out into the wilderness, away from the conveniences of civilization. Whether you’re heading on a day hike, Appalachian Trail thru-hike or a camping trip, it’s important to have done reconnaissance (recon) for the area you’re heading into.
Hike Recon: Why Should I?
A lot of people I meet tell me that, when the mood strikes, they’ll grab a pack and head out for a hike. And, in most cases, that approach doesn’t present too many problems. Usually these people are going on a (short) day hike close to home on a trail they’ve most likely already hiked. Performing hike recon really isn’t something they think about in this scenario.
Hike recon is more important when you’re heading a decent distance from home and plan on hiking in an area you’ve never been to previously. For instance, I’m planning on hiking Bear Mountain in upstate New York with a few coworkers. We all live on Long Island, NY and none of us have ever hiked there. Hike recon is important to us for a few reasons:
- Understand the terrain we’re entering
- Determine a hiking route
- Understand equipment requirements of the area (crampons, ice axes, additional water, etc.)
- Acquire driving directions (multiple routes)
- Determine post-hike locations (restaurants, restrooms, gas stations, etc.)
Initial Hike Recon: Google It!
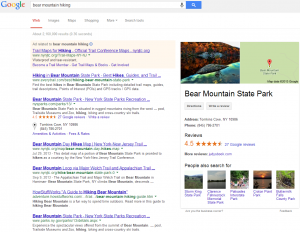
For your initial hike recon, Google is your friend. You can use it to search for all kind of information – maps, hike reviews, driving direction, expected trip duration, driving directions, etc. To start this process, try typing in {hiking location} hiking. When we typed in Bear Mountain Hiking, the following results appeared:

This search provides you with a wealth of information. Right away, you can click on the link to the right and get directions. By manipulating Google Maps, you can create multiple driving routes and print them out. In addition to the Google Maps link, there are also links to the NYS Park Department, specifically the page associated with Bear Mountain. You can find links to trail reviews, places to buy maps, and general information about the State Park. Just about everything you need is here.
Google Maps also gives you the opportunity to see a topography map of the area. If you’re not familiar with the term, a topography gives you a feel for the elevation terrain of an area. Contour rings on the map designate changes in elevation and, by studying these maps, you can get a good feel for how the terrain changes in that particular area. All you have to do to get a topographic map is click the map ‘box’ (the one to the right at the top of the screen) and a pulldown menu will appear. Click Terrain and you’ll be provided with a topographic map.
Organization Methods
All this information is great, but you need to organize it. I prefer to use Evernote for this kind of data collection. It allows me to clip information from webpages, upload pictures and PDF files and generally keep everything for a particular hike organized in one spot. It also syncs to the cloud so I can share the information with my buddies.
Other Resource For Hike Recon
While Google and Google Maps gets you 90% of the way to a full recon, there are a variety of other ways to gather information on a new hiking location.
Google Earth
Google Earth is a great tool to get a better feel for the contour of the land. You can download the application for free and use it to ‘explore’ the surrounding area of interest. The views provided by Google Earth, as well as the topographic maps from Google Maps, should provide you with sufficient information to make a determination on the type of elevation change the area you’re going to hike in will have. Google Earth is also good for determining mid-hike destination points. Users have provided pictures that are geotagged to certain locations. You can use these pictures to see if a certain spot interests you and plan your hike accordingly.
Social Hiking Websites
I typically visit Trails.com and AllTrails.com before a hike. Each one of these sites is a mix between a mapping site and a social site. Users typically download an app (both paid and free) to their smart phone and track their hikes. They can then provide feedback on the trails, key views not to miss or areas of concern (loose rock, muddy in the spring, etc.) that you may want to avoid. While I’ve used them in the past, I don’t track my hikes that much anymore on the apps. I simply don’t find that I get too much out of it. The sites, however, are a wealth of information especially when you are visiting a new area. Finding websites for local hiking clubs are also very valuable as these folks tend to hike the trail often (it’s in the their backyard) and are full of tips suggestions for hiking in that area.
Local and State Park Website
It goes without saying that, if you’re hiking in a local municipality park or a state park, you need to follow the rules for that park. The websites for these parks will provide you with information such as:
- Parking information – location, fees, access to trails
- User Information – some parks charge to hike or require a permit for certain trails
- Driving directions
- Local attractions
- Where to purchase trail maps
Weather Related Websites
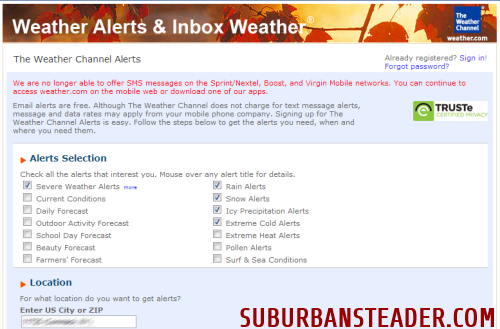
Weather.com is my first stop as the trip nears for weather reports. They typically provide reports geared towards outdoor activities and, in my experience, are more accurate than some of the other sites. You, of course, are free to use the site of your choice. I also go to websites that provide historical weather. AnyPlaceAmerica.com is a pretty good choice since it’s a one stop shop for historical weather data and printable topographic maps.
Hike Recon Wrap-Up
While it’s an important step, performing hike recon is a fairly easy process. The internet, specifically Google (searches, Maps and Earth), are full of interesting information. In addition, local and state agencies are more than willing to provide information you need – sometimes at a cost. The most important thing you can do when you are performing reconnaissance for your hike is over-inform yourself. Too much information is always safer than not enough information.
We’d love to hear your tips and tricks for performing hike recon. Let us know in the comments or on Facebook!
photo credit: Calsidyrose via photopin cc


